Integrating the Braintree Payment solution in React Native/Expo and Node.js
Introduction
Recently got on a project to integrate Braintree as a payment system on an Expo project, and couldn't find any resources on doing that, so this is my attempt at one.
In this article, we will integrate the Braintree API Gateway SDK along with Node.js and Express, and then we will create a front-end application using Expo/React Native.
At the end of this, you should have a functioning integration that accepts credit/debit card payments in sandbox using Braintree Direct's drop-in user interface.
Getting Started
So, to get started, the first step would be installing the braintree server npm module on your expressjs project.
npm install braintree --saveWhen we have that installed, we want to setup a payment controller & route to resolve transactions through the Braintree payment gateway.
const braintree = require("braintree");

// Set your secret key. Remember to switch to your live secret key in production.
const gateway = new braintree.BraintreeGateway({
  environment: braintree.Environment.Sandbox,
  merchantId: process.env.BRAINTREE_MERCHANT_ID,
  publicKey: process.env.BRAINTREE_PUBLIC_KEY,
  privateKey: process.env.BRAINTREE_PRIVATE_KEY,
});

app.post('/createPaymentTransaction', async (req, res) => {
  const { body } = req;

  try {

    //create a transaction
    const result = await gateway.transaction.sale({
      amount: body.amount,
      paymentMethodNonce: body.nonce,
      options: {
        submitForSettlement: true
      }
    });

    res.status(200).json({
      isPaymentSuccessful: result.success,
      errorText: result.transaction?.processorResponseText || "",
    });

  } catch (error) {
    console.log("Error in creating transaction ", error);
    res.status(400).json({
      isPaymentSuccessful: false, errorText: "Error in creating the payment transaction" + error
    });

  }
});
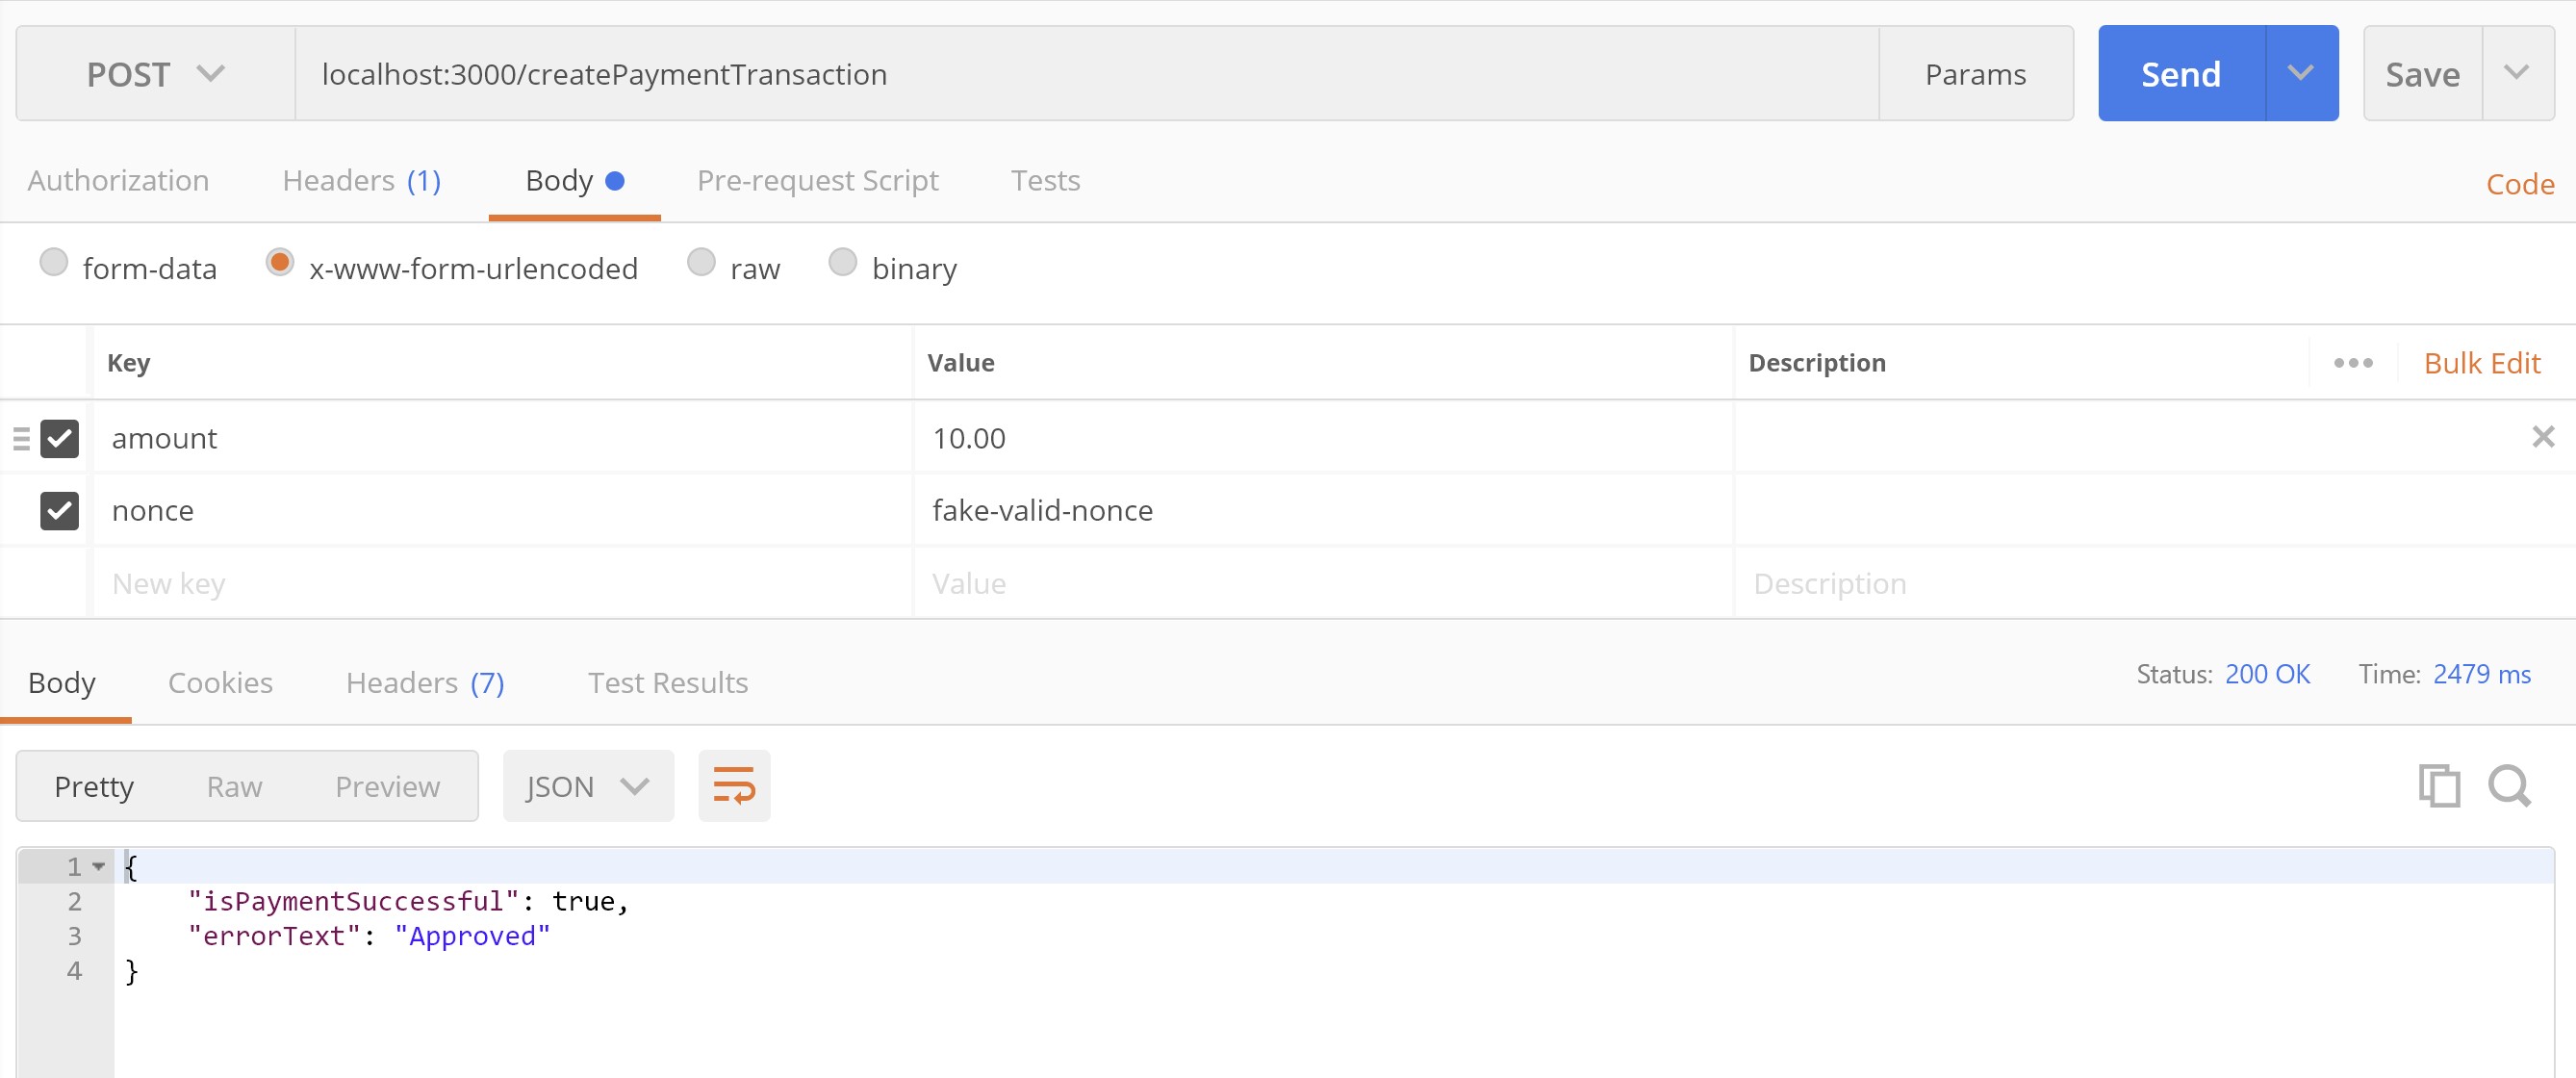
To test if the above is working properly, you can pass 'fake-valid-nonce' to the nonce key using Postman or other API clients.

Next, Setup HTML client
We want to collect the customer payment information. The easiest way to get up and running is via the Drop-in UI. We'd be serving the HTML file via express.
<html>

<head>
  <meta charset="utf-8">
  <meta name="viewport" content="width=device-width,initial-scale=1">
  <script src="https://js.braintreegateway.com/web/dropin/1.33.2/js/dropin.min.js"></script>
</head>

<body style="display:flex;flex-direction: column;">
  <div id="dropin-container"></div>
  <button id="submit-button" class="paymentButton">COMPLETE PAYMENT</button>
  <script>
    var button = document.querySelector('#submit-button');
    braintree.dropin.create({
      authorization: '', //the tokenization key from Braintree
      container: '#dropin-container'
    }, function (createErr, instance) {
      button.addEventListener('click', function () {
        button.textContent="PROCESSING PAYMENT";
        instance.requestPaymentMethod((requestPaymentMethodErr, payload) => {
          // Send payload to React Native to send to the server
          window.ReactNativeWebView.postMessage(payload.nonce);
        });
      });
    });
  </script>
</body>

</html>
Key things from the HTML file above
The authorization property when setting up the braintree dropin ui. We'd be using the Braintree tokenization key, here's Braintree's guide on getting the key.
When the drop-in client SDK communicates the customer's card information to Braintree, Braintree returns a payment method nonce, and we want to send that to React Native.
We do that by using the window.ReactNativeWebView.postMessage method
The express routing to serve the HTML file:
const path = require('path');

app.get('/braintree', function (req, res) {
  res.sendFile(path.join(__dirname, 'braintree.html'));
});
Lastly, Setup React Native Client
We want to embed the HTML served by express in a webview on react native. First, install the react-native-webview package.
npm install --save react-native-webviewOr if you're using Expo,
expo install react-native-webviewAfter installing the webview package, we'd be creating the component to embed the /braintree route in the Webview.
const HOST = "http://10.0.2.2:3000";

const BrainTreePaymentWebView = ({
  onNonceRetrieved
}) => {

  return (
    <View style={{ height: 450 }}>
      <Text style={{fontSize: 30, fontWeight: '500'}}>BrainTree Payment Integration</Text>
      <WebView
        source={{ uri: `${HOST}/braintree` }}
        onMessage={(event) => {
          onNonceRetrieved(event.nativeEvent.data);
        }}
      />
    </View>
  )
}
After creating the Braintree component, we'd want to get the payment nonce to the Braintree payment transaction resolver route, createPaymentTransaction.
  <BrainTreePaymentWebView
        onNonceRetrieved={async (nonce) => {
          const response = await axios.post(`${HOST}/createPaymentTransaction`, {
            amount: 10, //change to price gotten from your user
            nonce: nonce,
          });
          const { isPaymentSuccessful, errorText } = await response.data;
          Alert.alert(isPaymentSuccessful ? "Payment successful" : `Payment error - ${errorText}`);
        }}
      />
And, we are done!!!!
To test the Braintree payment integration, use the following test cards provided by Braintree.
When you click on Complete Payment, the app should show an alert informing you that the Payment is successful.
Done
The Working version of this article is available on GitHub — https://github.com/edwardsmoses/braintree-rn-integration-sample
Here are some resources/documentation that could be helpful during your integration:
https://developer.paypal.com/braintree/docs/start/overview https://developer.paypal.com/braintree/docs/guides/authorization/tokenization-key/javascript/v3 https://developer.paypal.com/braintree/docs/guides/credit-cards/testing-go-live/php https://developer.paypal.com/braintree/articles/control-panel/important-gateway-credentials/#api-credentials
Edwards Moses
Web & Mobile — React & React Native Consultant
I'm Edwards, based in Lagos, Nigeria.
Freelancer Software Developer — collaborating with teams to craft extraordinary products.
From conception through to completion, I find immense joy in witnessing the evolution of an idea into a fully realized product in the hands of users. Check out my projects and articles to see what I've been up to lately.
Ready to bring your ideas to life?
Comments